
How to Cancel Envato Elements Subscription: Step-by-Step Guide

Thinking about canceling your Envato Elements subscription but not sure where to start? You’re in the right place. Whether you’ve found a different resource or simply need to tighten your budget, it’s essential to know how to effectively manage your subscriptions. With Envato Elements, you get access to an array of digital assets, but sometimes life calls for a change.
Canceling doesn’t mean losing everything immediately. You’ll still have access until your next billing date and can use items already licensed for specific projects. However, keep in mind that once you decide to cancel, any promotional pricing won’t be available if you choose to resubscribe later.
Navigating through account settings can sometimes feel like deciphering a secret map, but don’t worry—canceling is straightforward once you know the steps. Let’s walk through how you can smoothly end your Envato Elements subscription without any hiccups along the way.
Key Takeaways
- Canceling your Envato Elements subscription is a straightforward process that involves accessing your account settings, navigating to the subscription page, and confirming cancellation.
- You will retain access to licensed assets until the end of your billing cycle even after cancelation, but promotional pricing may not be available if you choose to resubscribe.
- Refunds are typically not offered unless specific conditions are met, such as changes in terms that negatively impact you.
- Common issues during cancellation can often be resolved by ensuring you’re logged into the correct account and following each step carefully; customer support is available for unresolved problems.
- Consider alternatives like pausing your subscription or adjusting plans instead of canceling outright to maintain access to resources while addressing budget concerns.
Steps To Cancel Envato Elements Subscription
Here’s a straightforward guide on how to cancel your Envato Elements subscription. Follow these steps to ensure a smooth cancellation process.
Accessing Your Account Settings
Log into your Envato Elements account. In the top right corner, you’ll spot your user account name. Hover over it to reveal several options and choose “My Account.” This section contains all the settings related to your account management.
Navigating To Subscription Page
Within the “My Account” section, find and select the “Subscription” tab. Here, you’ll see details about your current plan and billing cycle. Look for an option labeled “Manage Subscription,” which guides you closer to completing the cancellation process.
Confirming Cancellation
After selecting “Manage Subscription,” follow any prompts or instructions provided. A confirmation screen will appear before finalizing cancellation—review this carefully as it may include important information about access post-cancellation and any potential impacts on promotional pricing for future subscriptions if applicable.
Understanding The Refund Policy

When considering how to cancel Envato Elements subscription, it’s crucial to understand the refund policy. Refunds aren’t generally offered unless specific conditions are met.
Eligibility Criteria For Refunds
Refund eligibility depends on several factors. If changes in terms negatively impact you, a refund for unused months is possible. However, refunds aren’t typically given for reasons like changing your mind or subscribing by mistake. Insufficient expertise in using items also doesn’t qualify for a refund.
How Refunds Are Processed
Refund requests undergo an assessment based on their merits. You can start this process by opening a help request online. Consider downloading licensed items promptly since access might change post-cancellation if they’re removed from the platform.
Common Issues And Troubleshooting
Canceling your Envato Elements subscription can seem straightforward, but sometimes issues arise during the process. Knowing how to address these problems ensures a smoother experience.
What If You Encounter Problems?
If difficulties occur while canceling, verify you’re logged into the correct account. Mistakenly using another account could prevent access to cancellation options. Ensure you follow each step in the “how to cancel envato elements subscription” guide carefully, as skipping steps might cause errors. Check your internet connection if pages fail to load or actions don’t complete.
Who To Contact For Assistance
For unresolved issues, reach out to Envato’s customer support team. They’re equipped to handle technical problems and provide guidance on cancellation issues. Use the online contact form on their website for a direct response from support specialists who can assist with specific queries related to your subscription cancellation process.
Alternatives To Cancellation

Considering alternatives to canceling your Envato Elements subscription can help maintain access to valuable resources without fully committing to termination.
Pausing Your Subscription
Instead of canceling, pause your subscription if you need a temporary break. This option allows you to halt payments and access for a specific period while retaining your account details and promotional pricing eligibility. When you’re ready, simply resume your plan and pick up where you left off.
Adjusting Subscription Plans
Explore different subscription plans if budget constraints are influencing your decision. Envato may offer various pricing options based on geographical location or special offers that suit your needs better. By adjusting your current plan instead of following the steps in “how to cancel envato elements subscription,” you might find a more cost-effective solution while continuing to enjoy its benefits.
Conclusion
Deciding to cancel your Envato Elements subscription is a personal choice that depends on your unique needs and circumstances. Whether you’re cutting costs or exploring other resources, it’s important to understand the implications of cancellation. Remember, you still have access until the next billing date, so make the most of it while you can.
If you’re not quite ready to sever ties completely, consider alternatives like pausing your subscription or adjusting your plan for more flexibility and value. Always review all prompts and confirmations during the process carefully to avoid any surprises down the line.
And if anything goes awry, don’t hesitate to reach out for support—Envato’s team is there to help. Whatever path you choose, ensure it aligns with what works best for you moving forward.
The Power of Shape in Photography: A Visual Guide

As a photographer, I’ve learned that shape is one of the most powerful elements in visual composition. It’s the foundation upon which we build captivating images, transforming two-dimensional surfaces into dynamic scenes that tell stories and evoke emotions.
When I first started exploring photography, I overlooked the importance of shape. But as I honed my skills, I realized how crucial it is in creating compelling compositions. Shape in photography refers to the outline or contour of objects within a frame, often defined by contrast, lighting, or the arrangement of elements. It’s a fundamental building block that can make or break an image, guiding the viewer’s eye and creating visual interest.
What Is Shape in Photography?
Shape in photography is the two-dimensional outline or silhouette of objects within a frame. It’s a fundamental visual element that plays a crucial role in composition, helping to create interest, guide the viewer’s eye, and convey meaning. I’ve found that shapes can be geometric (like circles, squares, and triangles) or organic (such as curves and irregular forms found in nature).
When I capture images, I pay close attention to how shapes interact with each other and the overall frame. Strong shapes can create powerful visual statements, while subtle shapes can add depth and complexity to a composition. The interplay of light and shadow often defines shapes, making them more or less prominent in an image.
I’ve noticed that shapes in photography can be:
- Positive: The main subject or object in the frame
- Negative: The space around or between objects
- Abstract: Simplified forms that may not be immediately recognizable
Understanding and utilizing shape effectively has greatly improved my ability to create compelling images. It’s a key element that I consider alongside other compositional tools like line, texture, and color to craft visually striking photographs.
Types of Shapes in Photography
Shapes in photography come in various forms, each contributing uniquely to an image’s composition and visual impact. I’ll explore four primary types of shapes that photographers often work with to create compelling images.
Geometric Shapes
Geometric shapes are regular, mathematically precise forms found in both natural and man-made environments. These include:
- Circles
- Squares
- Triangles
- Rectangles
- Polygons
I use geometric shapes to add structure and balance to my compositions. They’re particularly effective in architectural photography, where I can highlight the clean lines and symmetry of buildings. In urban settings, I often look for repeating geometric patterns to create visually striking images.
Organic Shapes
Organic shapes are irregular, free-flowing forms typically found in nature. They include:
- Curves of a landscape
- Outlines of plants and trees
- Shapes of clouds
- Silhouettes of animals
When photographing organic shapes, I focus on their natural beauty and fluid lines. These shapes add a sense of movement and softness to images, contrasting nicely with geometric elements. I find organic shapes particularly useful in landscape and nature photography, where they help capture the essence of the natural world.
Positive Shapes
Positive shapes are the primary subjects or objects in a photograph. They’re the forms that immediately draw the viewer’s attention. Examples include:
- A person’s silhouette
- A prominent building
- A tree against the sky
I use positive shapes to create focal points in my images. By carefully positioning these shapes within the frame, I guide the viewer’s eye and establish the main subject of the photograph. Strong positive shapes can make even simple subjects appear striking and memorable.
Negative Shapes
Negative shapes are the spaces around or between positive shapes. They include:
- The sky between tree branches
- Gaps between buildings
- Space surrounding a subject
I find negative shapes just as important as positive ones in creating balanced compositions. They can frame the main subject, add depth to an image, or create interesting abstract patterns. By paying attention to negative shapes, I can enhance the overall impact of my photographs and create more dynamic compositions.
Characteristics of Shapes in Photography

Shapes in photography possess distinct characteristics that significantly impact visual composition. I’ve identified several key attributes that define shapes and their role in creating compelling images:
- Geometry:
- Regular: Circles, squares, triangles with consistent angles and sides
- Irregular: Asymmetrical forms with varying angles and curves
- Dimensionality:
- Two-dimensional: Flat shapes without depth
- Three-dimensional: Objects with volume and form, creating illusion of depth
- Clarity:
- Defined: Sharp edges and clear boundaries
- Abstract: Blurred or suggested shapes, open to interpretation
- Relationship:
- Isolated: Stand-alone shapes drawing focus
- Interconnected: Shapes that overlap or interact with each other
- Contrast:
- High contrast: Shapes that stand out against their background
- Low contrast: Shapes that blend subtly with their surroundings
- Size:
- Dominant: Large shapes commanding attention
- Subordinate: Smaller shapes supporting the overall composition
- Repetition:
- Patterns: Recurring shapes creating rhythm and harmony
- Unique: Singular shapes acting as focal points
- Orientation:
- Vertical: Upright shapes conveying strength and stability
- Horizontal: Shapes evoking calmness and tranquility
- Diagonal: Dynamic shapes suggesting movement and energy
- Texture:
- Smooth: Shapes with uniform surfaces
- Textured: Shapes with visible detail and tactile qualities
- Symbolism:
- Cultural: Shapes with specific meanings in different societies
- Universal: Shapes with widely recognized interpretations
Understanding these characteristics enables photographers to manipulate shapes effectively, creating visually striking and meaningful compositions in their work.
The Difference Between Shape and Form

Shape and form are two fundamental elements in photography that often get confused, but they’re distinct concepts with unique roles in composition. While both contribute to the visual impact of an image, understanding their differences is crucial for creating compelling photographs.
Shape in photography refers to a two-dimensional outline or silhouette of an object. It’s what we see when light and shadow interact with the subject, creating a flat representation. Shapes are typically defined by their edges and can be geometric (like circles, squares, or triangles) or organic (such as the irregular outline of a tree).
Form, on the other hand, adds depth to shapes, giving them a three-dimensional quality. It’s the perception of volume and mass in an image, often enhanced by lighting, shadows, and perspective. Form allows us to understand the full structure of an object, not just its outline.
Here’s a comparison of shape and form in photography:
| Aspect | Shape | Form |
|---|---|---|
| Dimensionality | 2D | 3D |
| Representation | Silhouette or outline | Volume and mass |
| Visual cues | Edges and contours | Lighting, shadows, and perspective |
| Depth perception | Flat | Creates illusion of depth |
| Examples | A circle, a square | A sphere, a cube |
I find that mastering the use of both shape and form is essential for creating visually striking images. While shapes can create bold, graphic compositions, forms add depth and realism to photographs. By skillfully manipulating these elements, photographers can guide the viewer’s eye and evoke specific emotions or interpretations within their work.
How to Use Shape in Photography Composition
Incorporating shapes effectively in photography composition enhances visual interest and conveys powerful messages. Here are key techniques to master the use of shape in your photographic compositions.
Utilizing Light and Shadow
Light and shadow play crucial roles in defining shapes within an image. I use directional lighting to create strong contrasts, emphasizing the outlines of objects. Side lighting accentuates textures and forms, while backlighting produces striking silhouettes. By manipulating light, I control how shapes are perceived, adding depth and drama to my compositions.
Playing with Perspective
Changing perspective alters how shapes appear in a photograph. I experiment with different angles, such as shooting from low or high vantage points, to create unique shape compositions. Getting close to subjects can isolate and emphasize specific shapes, while stepping back allows me to capture the relationship between multiple shapes in a scene.
Experimenting with Focal Length
Focal length significantly impacts the perception of shapes in an image. Wide-angle lenses exaggerate foreground shapes and create a sense of depth, while telephoto lenses compress perspective and flatten shapes. I choose my focal length based on the desired effect, whether it’s to emphasize a single shape or show the interplay between multiple shapes in the composition.
Creating Patterns and Repetition
Patterns and repetition of shapes create rhythm and visual interest in photographs. I look for naturally occurring patterns in architecture, nature, or everyday objects. By framing these repeated shapes thoughtfully, I create compelling compositions that draw the viewer’s eye through the image. Breaking patterns with a contrasting shape can add an element of surprise and focal point to the photograph.
The Impact of Shape on Photographic Mood and Balance
Shapes play a crucial role in setting the mood and achieving balance in photography. I’ve found that different shapes evoke distinct emotional responses and create varying atmospheres within an image.
Geometric shapes, such as squares and triangles, often convey stability and structure. When I incorporate these shapes into my compositions, they tend to create a sense of order and formality. Circular shapes, on the other hand, suggest softness and continuity, evoking a more relaxed and harmonious mood.
The use of organic shapes, like those found in nature, can infuse a photograph with a sense of fluidity and naturalness. I’ve noticed that these shapes often create a more calming and serene atmosphere in my images.
Balancing shapes within a composition is essential for creating visually appealing photographs. I achieve this by:
- Distributing shapes evenly across the frame
- Using the rule of thirds to place key shapes at intersection points
- Incorporating negative space to highlight important shapes
- Utilizing symmetry or asymmetry to create tension or harmony
The interplay of light and shadow further enhances the impact of shapes on mood and balance. Strong, hard-edged shadows can create dramatic contrasts and emphasize geometric shapes, while soft, diffused light can blur shape boundaries, resulting in a more ethereal atmosphere.
When working with shapes in photography, I consider:
- Scale: Contrasting large and small shapes to create depth and interest
- Repetition: Using recurring shapes to establish rhythm and pattern
- Juxtaposition: Placing contrasting shapes together for visual tension
- Framing: Using shapes to guide the viewer’s eye to the main subject
By carefully considering the impact of shapes on mood and balance, I can create more compelling and emotionally resonant photographs that effectively communicate my intended message to viewers.
Shape in Different Photography Genres
Shape plays a crucial role across various photography genres, influencing composition and visual impact. Let’s explore how shape is utilized in different types of photography.
Landscape Photography
In landscape photography, shapes create structure and guide the viewer’s eye through the scene. I often use natural shapes like mountains, trees, and clouds to add depth and interest to my compositions. For example, a winding river can form an S-shape, leading the eye through the frame. Silhouettes at sunset can transform complex landscapes into simple, striking shapes that evoke emotion and capture the essence of a place.
Portrait Photography
Shapes are essential in portrait photography for creating flattering and visually appealing images. I pay close attention to the shape of the subject’s face, body, and pose to convey personality and mood. Using techniques like Rembrandt lighting creates distinct triangular shapes on the face, adding depth and character. The shape of clothing, accessories, and background elements also contribute to the overall composition, framing the subject and drawing attention to key features.
Abstract Photography
Abstract photography relies heavily on shape to create intriguing and thought-provoking images. I focus on isolating shapes from their context, emphasizing geometric patterns, lines, and forms. By manipulating light, shadow, and perspective, I transform everyday objects into abstract compositions. Repeating shapes, contrasting curves and angles, and exploring negative space are techniques I use to create visually striking abstract photographs that challenge viewers’ perceptions.
Conclusion
Shape is a fundamental element in photography that can’t be overlooked. It’s a powerful tool for creating compelling images that resonate with viewers. By understanding and mastering the use of shapes, photographers can elevate their work to new heights. Whether you’re capturing landscapes, portraits, or abstract scenes, paying attention to shapes will undoubtedly enhance your photographic skills. I encourage you to experiment with different shapes in your compositions and see how they transform your images. Remember, great photography isn’t just about capturing what you see it’s about creating visual stories through thoughtful composition.
Frequently Asked Questions
What is the importance of shape and form in photography?
Shape and form are crucial in photography as they help create visually appealing and meaningful images through light manipulation. They contribute to the overall composition, guiding the viewer’s eye and evoking specific emotions. Shape and form can add depth, balance, and interest to photographs, making them more impactful and engaging.
How do different shapes influence the mood of a photograph?
Different shapes can evoke specific emotions and atmospheres in photographs. For example, circles and curves often create a sense of harmony and softness, while triangles and sharp angles can convey energy or tension. The choice and arrangement of shapes in a composition significantly impact the overall mood and message of the image.
What techniques can photographers use to enhance shapes in their images?
Photographers can enhance shapes using various techniques, including:
- Utilizing light and shadow
- Playing with scale
- Employing repetition
- Creating juxtaposition
- Strategic framing
These methods help emphasize shapes, create visual interest, and effectively convey messages in photographs.
How does shape play a role in landscape photography?
In landscape photography, shapes like mountains, rivers, and trees add depth and guide the viewer’s eye through the image. Natural formations create distinct shapes that can be used to structure compositions, create focal points, and evoke emotions associated with the landscape. Shapes in landscapes also help convey scale and perspective.
What is the significance of shape in portrait photography?
Shape is crucial in portrait photography for creating flattering images. Photographers focus on the subject’s face, body, and pose to create appealing shapes. The arrangement of these shapes can emphasize certain features, convey personality, and create a balanced composition. Proper use of shape can make portraits more dynamic and visually interesting.
How is shape utilized in abstract photography?
Abstract photography heavily relies on shape to create intriguing images. It emphasizes geometric patterns and manipulates light and perspective to transform everyday objects into abstract compositions. By focusing on shape, abstract photographers can create visually striking images that challenge viewers’ perceptions and evoke emotions through form rather than recognizable subjects.
Things to Remember When Buying Cheap Astro Stock Photos
When buying cheap Astro stock photos, knowledge about cheap stock photo sites that offer the best pricing and plans is not enough. There are some things you need to remember in order to make the purchasing process interesting and stress-free. With the proliferation of image collections, you are given more choices for your creative projects. Knowing some tips on buying cheap stock images will help you find the image you need.
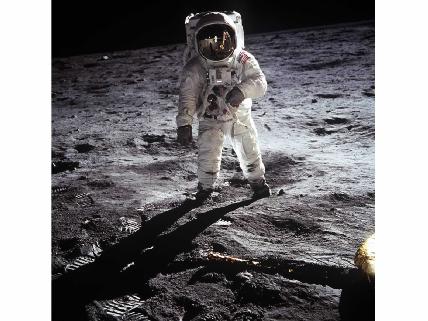
- Check for quality. While most cheap stock photo sites offer only high quality images, it is still imperative for you to check out thumbnails to make sure that the quality is indeed superior. Look at the thumbnails to determine if the photo is suitable for your projects based on colors and themes. This will save you time and effort from clicking the image just to make sure it is what you are looking for.
- Look for sign releases. Sign release is an important thing to remember when buying cheap stock images. It is included in the license when you purchase a stock photo cheap from stock photo agencies. A sign release or model release proves that the person or model in the photo agrees to use his or her image for your creative projects.
- Be patient. When buying cheap stock images, it takes more than just good taste and budget. You also need patience to find the perfect image for your creative needs. With the increasing number of photos every day, it becomes more difficult for you to find what you are looking for. With patience, you will be able to get through lengthy searches and even sluggish downloading.
- Be proficient in editing. While this may be optional, it helps if you know how to use photo-editing applications and software. Sometimes, you encounter photos that are not readily suitable for your projects. Thus, you need to adjust colors, brightness, position and many other factors to make it fit your needs. If you do not have the skills and time to make the edits, you can always hire someone to do it for.
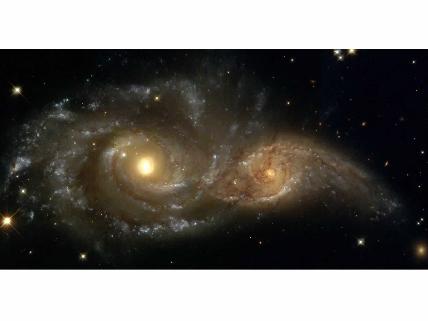
- Recognize the importance of cheap stock galaxy images. If you are not a professional photographer, you should recognize the fact that the image that come out from your camera is not always good enough for you projects. While you may have the necessary equipment to conduct a photoshoot, you cannot produce quality images without the right skills and knowledge. Thankfully, there are stock photos cheap from www.StockPhotoSecrets.com to save your day.
Buying cheap stock photos is not difficult if you know how to look for images and what images to look for. You need to have the knowledge and skills to determine quality, ask for model releases, and use photo-editing apps. You also need to be patient. By remembering these things, you can have a smooth and fun purchasing experience.
You can visit the resources page of this site and you can see the resources or website where we get our royalty free astro stock photos used in this website.
What is the Cheapest Stock Photo Site?
When it comes to stock photos, a great majority of customers would always think about prices per image or subscription rates – as well as other perks that go with it. They would always want to know where they can get the cheapest stock photos.
Although it doesn’t necessarily mean that cheap stock photos are of inferior quality compared to expensive stock photos, there are a lot of customers who have limited budget to spare for project or website aesthetics so they would mostly prefer cheap stock photos – and in this case, the cheaper the better.
Finding the cheapest stock photo site needs research and, sometimes, even scouring the web for quality websites that could give you the best offer for your buck – or cents. There are a lot – and I mean A WHOLE LOT – of websites that promises “the cheapest stock photos” but fails in the quality or quantity department, so there’s no point in investing there.
To spare you the trouble of spelunking through the every crevice in the internet to find the cheapest stock photo site that’s rich in both quality and quantity, here’s a list of the top 5 stock photo agencies. The list will give you an insight about each site’s offers and pricing and the top one is where you can find the cheapest stock photos for your project and website needs.
- Number 5 – Shutterstock

Shutterstock has a pricing of a single royalty-free stock photo at $0.28. New users will also have access to their weekly free photos and other bonuses.
- Number 4 – Dreamstime

Dreamstime offers $0.20 for a single royalty-stock photo and, like other stock photo websites, they also offer a free photo gallery when you sign up for a new membership. Dreamstime has a very flexible purchasing system that will conveniently lead you to the images section worth $0.20 apiece.
- Number 3 – Fotolia

Fotolia offers an even cheaper price than the previous two agencies. With $0.14 for one royalty-free stock photo, their website also has a free image gallery, and an option to download a Microsoft add-on and a Fotolia Desktop for the users’ convenience.
- Number 2 – Depositphotos

As one of the most popular sites around, Depositphotos offers both quality and quantity stock photos for their clients and a cheap price per photo at $0.10 apiece. New users can also enjoy their free trial for all new members which enables them to download 35 free stock photos (5 photos per day for a 7-day period). They also let users have the option to choose their buying plan for more $0.10 images. With these much advantages, they are surely a site worth checking out.
- Best Cheapest Stock Photo Site – Photospin

And last, but not least, on the list of the cheapest stock photo agency on a price per photo comparison goes to Photospin. Users can spend for as low as $0.01 per stock photo with over 2.5 million images to choose from. Although it isn’t as much as other popular stock agencies, but with that cheap price there’s no way you can possibly pass up on such an offer. That amount of image library is still definitely large enough to at least contain several images that you need.